Contents
How to clean a bike chain without removing it
Most of us don’t have the time to thoroughly remove the chain of the bike to clean it. Therefore, here’s an easy guide on how to clean the bike chain while it’s still intact on your bicycle.
See also:
First of all, the chain is important to clean. The very reason for this is that it saves the drivetrain lifespan and therefore, it saves money in the long run. If you don’t want to spend a ton of dollars for expensive repairs, you must clean your bike chain properly. Here’s how you can conveniently clean it:
1. Get a degreaser
The first step that you want to do is to get oil off the hands when you touch your chain. For this, you will need a specific degreaser that is meant for bike chain cleaning. When you do this process, you should use gloves to protect your hands from the grossness of the grease.
2. Dry your chain
Before you apply the degreasing agent, dry your chain thoroughly by wiping it clean.
3. Apply the degreaser
Pour a small amount into a container, such as a sawn-off water bottle. Then, you can start painting the degreaser into the chain using a brush and then pedal your chain backward.
4. Let the degreaser work
Let it sit for a couple of minutes until the degreaser does its job. This depends on the size of your bike and how dirty it has been.
5. Clean in-between the chains
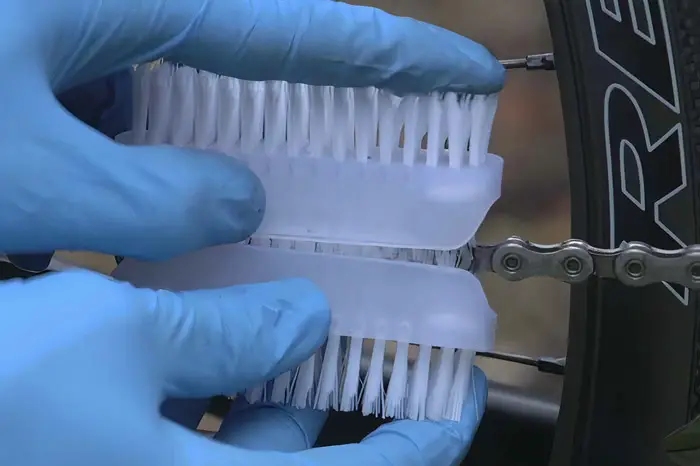
Most bike owners and enthusiasts will tell you that cleaning with a sponge and hot water will still leave gunk. Therefore, here’s a simple hack: use two nail brushes available at the pharmacy or supermarkets. With this, sandwich your two nail brushes and pedal your chain backward.
This step is important as it will clean the chain inside and out. If you are having trouble with the size of the nail brushes, trim the inside if it doesn’t fit into the chain.
Alternatively, a chain bath/cleaner is a more convenient way of cleaning your chain without taking it. They are available in most bike shops and they’re a bit more efficient than the nail brush technique. With this tool, all you need to is sandwich your chain, fill the top reservoir with a degreaser, and then pedal backward to clean it up.
5. Finishing the cleaning process
Once you are done with all the processes mentioned above, finish with a sponge and hot, soapy water to get the degreaser off. This step is highly important because if you don’t do it, residue won’t make chain oil stay properly.
Dry it with a rag, and then re-lube your chain. As a tip: use aerosol lube first to make it dry, especially when storing outside.
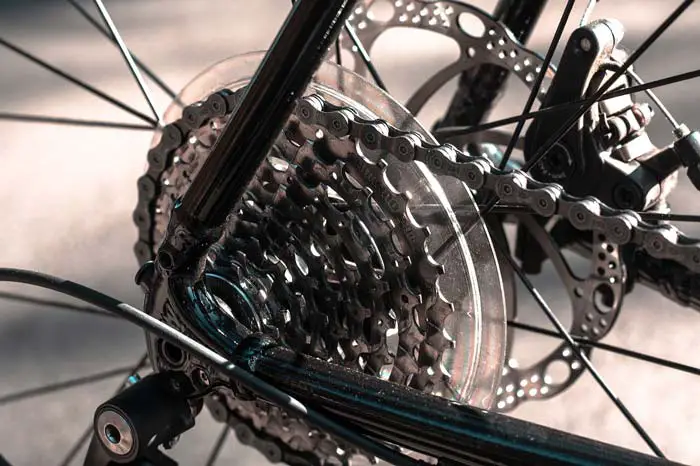
After the cleaning process for the chain, it is also important to look at the other parts for warning signs of gunk to avoid corrosion. For instance, the rest of the drivetrain needs to be cleaned. You can also paint your degreaser onto the cassette onto the jockey wheels.
Remove and clean it properly
If you do want a thorough way of leaning your bike chain, it’s best to take it off the bike. Here are easy steps on how to do it (which is also cost-effective at most):
1. Remove your chain (and other parts if you like)
You first need to locate your chain. Look for the sprocket with the teeth, the driver at the back, and the chain in the middle. To clean and lubricate the chain, removal depends on the type that you have. For instance, regular chains from Walmart have a master link.
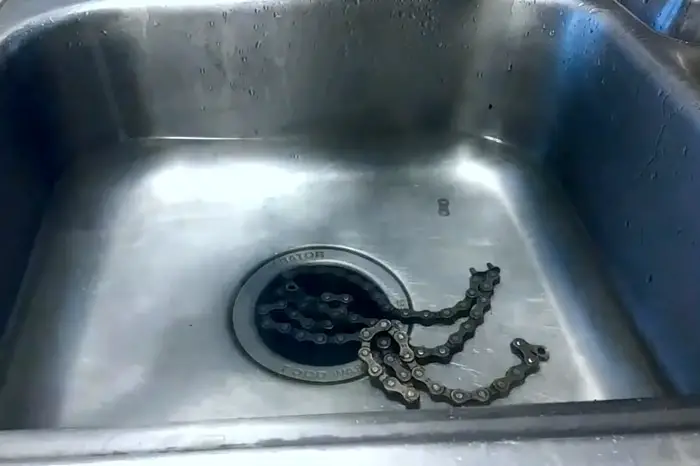
If you have this kind of chain (which is usually less expensive and more common), use a key or similar object and then pop off the master link. Then, use a paper towel to place the master link pieces in there. Afterward, slide the master link lock off and the whole chain should come off. Be prepared to have dirty hands because chains are usually greasy and gross.
As mentioned in the step, you can also clean the sprocket and driver as well for added benefits so that your chain will not get exposed to too much gunk.
2. Prepare your tools and cleaning setup
Use hot or warm water (cold water also works) and then an old toothbrush. Using such a throwaway toothbrush is important so you should keep them for cleaning items and home projects.
Fill your sink with water and throw in your bike parts along with the old toothbrush. Look for any dishwashing soap that cuts grease.
3. Start cleaning
Now, it’s time to clean your bike items. Start with the small parts and then the chain. To do this, brush the chain using the toothbrush. When you are cleaning in the middle, add soap as needed. Although this step is time-consuming, it will be worth it to make it more durable.
We like to clean both sides to add more protection to the bike chain. After all, gunk and grease can wear down your chain like sandpaper and it will degrade it.
4. Rinse off and dry
After you’ve successfully cleaned the chain (and other parts as needed), rinse and remove excess soap from them. Then, dry them up with paper towels. Don’t forget the master link if applicable. And of course, clean your sink because no one wants gunk and dirt from a bike chain sitting there!
5. Prepare your bike some more
With this step, you’ll want to prep your bike before you install the chain and other parts back. Prepare a lot of paper towels, as well as bringing a lubricant for chains and sprockets.
This is also the time to look for uneven wear and wipe the sprocket. Wipe the grooves and check for parts wearing down or loose.
6. Install the chain back
Now that your chain and other parts are back, it’s time to install them again as they were before. Make sure that everything is in the proper place.
7. Lubricate
After cleaning your bicycle chain, it is an item to lubricate it. First, apply a thin coat of oil using a paper towel as you pedal the chain. Then, put a paper towel on the driver and spin the chain to collect the excess oil. We don’t want too much oil onto the chain because it will simply collect too much dirt.
For better effectiveness in terms of a clean feeling, you can also do the sides of the chain (removing excess lube). Do it a couple of times as needed until the lubrication is just right.
How to clean a bike chain with household products
If you want a simple way of bike chain cleaning using household products, here’s how:
- Put your bike in a bicycle stand for easier access.
- Remove your chain as instructed by the manufacturer (e.g. using the master link).
- Choose your household product for cleaning the bike chain, such as Kerosene, Shelite (metal cleaner), or any degreaser with a citrus scent.
- Degrease your chain using the said product and leave it for about 20 minutes, then rinse.
- Put the chain back onto the drivetrain.
- Lubricate as needed.
How to clean a rusty bike chain
While we do recommend getting a new bike chain due to being inexpensive and easy to find, if you have a rusted bike chain that you’d still like to clean anyway, along with the freewheel, here’s how to do it:
1. Remove the chain and freewheel
The first step is to detach your rusty components off the bike. You can use gloves if you don’t like touching corroded items.
2. Put them in a container
After that, put them in a plastic container. This is to ensure that you won’t leak out the formula that you want to pour over your bike chain (and other parts). Make sure that the container is solely used for non-food items!
3. Start pouring your rust removal formula
We recommend using Evaporust or a similar formula. Simply pour it over the parts and make sure the formula completely covers the parts.
4. Let it soak
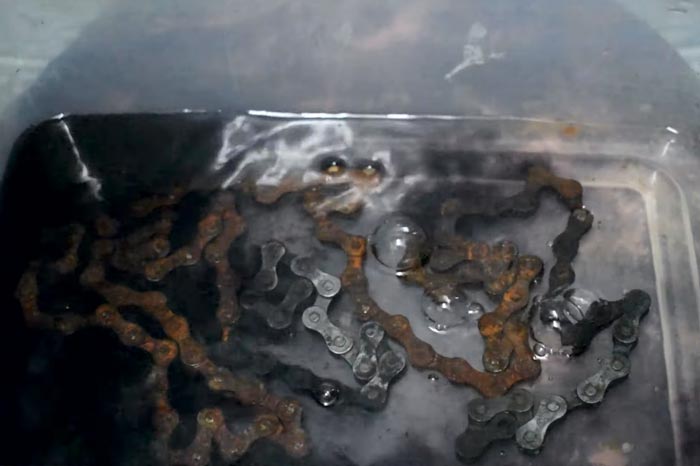
Now that you’ve poured your formula onto the bike chain and the like, let the parts soak for about 24 hours (you can also check them a little bit after 6 hours). It takes a lot of patience but if you do wait properly, it will remove all of the rust.
5. Rinse
After a good soaking, simply pull the parts out and rinse them in water. You will see that it looks nice and clean and the rust has been removed.
6. Clean and add finishing touches
If you want to make the parts more usable and protected, use a scrub brush and dish soap to clean them thoroughly. After that, to protect your parts, use WD-40 or rust inhibitor. You can also flush out the inside with WD-40 for extra protection. Last but not the least; add lubricant to make it turn smoothly.
How to clean and lube a bike chain with WD-40
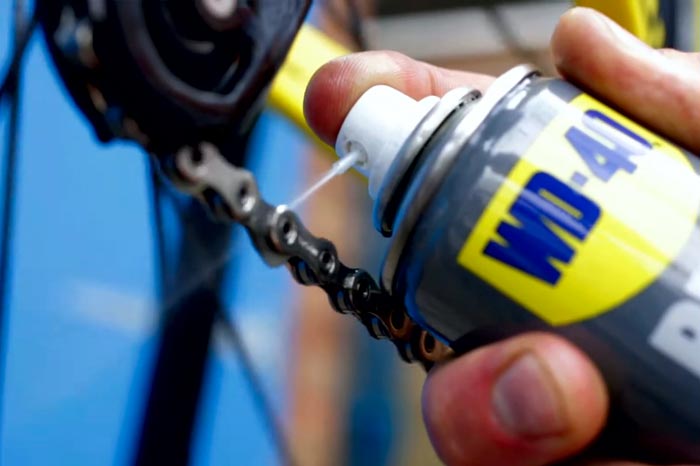
We did mention above that WD-40 is a way to inhibit rust on your bicycle parts. So, is it possible to clean and lube your bike chain with it? Let’s find out using the steps below:
1. Prepare and get protection
First of all, put on rubber gloves because bike chain handling is very messy. To start your cleaning process, all you do is flip the bicycle over with the chain and cranks facing your way. Prepare and use regular paper towels for the cleaning process – be sure to have a lot of stock nearby.
2. Start using WD-40
You won’t pick up a lot of grease and gunk with a simple paper towel so you need WD-40. That’s because simply using a paper towel doesn’t get all the dirt inside as there is no rust-penetrating formula to dissolve the grease.
As for the WD-40, spray a generous amount on the paper towel. After that, slowly rotate the chain while wiping it back and forth with the paper towel. You will notice that you will pick up a bit more when you use WD-40 as compared with simply using paper towels.
Let’s have a little background: WD-40 is not oil because it removes oil. It is rust penetrating formula and it takes all the oil away, so naturally, it’s a great bike chain cleaner.
3. Finishing touches
Now that the entire bike chain is removed of gunk and dirt, do a final clean pass with a dry paper towel to take out the excess WD-40 and dirt. Use wet weather oil with a thicker consistency if you don’t want to lubricate your chain every 2 days or so.
To do this, rotate the gear as you pour the oil and make sure you won’t hear any grinding or squeaking. As a warning: don’t put too much oil because oil attracts dirt and gathers into the chain, creating abrasions and wearing the chain out faster. Wipe off excess oil using paper towels.
How to Clean Bike Chain using Dishwashing Liquid and Baking Sodas
If you want a homemade recipe on cleaning a bike chain with cost-effective ingredients, here’s how:
What you’ll need:
- 1 tbsp dishwashing liquid
- 1 tbsp baking soda
- Container or bowl
- Spoon
- 2 tbsp water
- Bike chain cleaner (with inserting mechanism)
- Hose spray
- Dry cloth
- Cotton buds or Q-tips
Procedure:
- Combine dishwashing liquid and baking soda into a container or bowl.
- Pour in 2 tbsp water (add 1 tbsp at a time) and mix it well using a spoon.
- Next, pour the mixture into the bike chain cleaner.
- Insert the bike chain cleaner into the chain.
- Rotate the chain in all gears.
- Rinse the chain using hose spray.
- Rub the chain clean using a dry cloth.
- Optional: use cotton buds (Q-tips) to test if it is cleaned thoroughly
Common mistakes
When cleaning your bike chain, here are the most common beginner mistakes that you might be making that could compromise your bike parts:
1. Lubing a filthy drivetrain
Always make sure your drivetrain is clean before you lubricate it. That’s because adding more and more lubricant makes your drivetrain attracted to even more dirt.
2. Using the wrong brush for the job
It is important to keep your brushes separate to avoid risking contamination between the parts (and ruining them). Stiff brushes will scratch your frame (you don’t want that!).
3. Contaminating your brakes
Certain frame cleaners could contaminate your brakes. You can use disc protectors but if you don’t have those when using cleaners, it’s best to use a cloth or rag and then apply it to the bike separately to avoid getting contamination to the brakes.
Here’s a pro tip: anything you smell is probably on your brakes so don’t cast the entire frame cleaner onto the whole bike.
4. Not wiping off excess grease
It will keep your bike in tip-top shape, maintain cleanliness, and you don’t have to struggle with too much dirt. As mentioned above, too much grease leads to a dirtier bike.
5. Adding too much lubricant
It is too tempting to over-lube your chain but dust collecting is a problem. Moreover, excess lubricant will go straight on the floor!
To avoid adding too much lubricant, simply apply one drop of lube to each roller because anything else on the surface sitting there will attract grime and dirt. Do note that some brands may take a while to cure for optimal chain performance.
How often to clean bike chain
The ideal schedule of cleaning a bike chain is after every ride. However, the real answer to how often to clean your bike chain depends on the following:
- How often do you use your bike?
- What are the weather conditions outside?
- Is your area heavily polluted?
- What kind of lubricant do you use?
As mentioned above, certain types of lubricants and cleaners require less frequency in terms of maintenance. However, if you know that you use your bike more often, such as for daily commutes, we recommend cleaning it more often.
Bicycle chain maintenance
Aside from cleaning your chain, there are other maintenance needs that you’ll need to remember with a bike chain:
1. Lubrication
Now that you cleaned your chain, you also have to consider good lubrication. Keeping your bike chain properly lubricated could extend the chain lifespan up to 9,000 miles or so. If you are new to bikes then it’s best to ask your bike shop owner or staff about the ideal lubricant for the job.
2. Replace parts when needed
Don’t be afraid to throw away old parts or reuse them for other purposes, such as home decoration. Many bike owners and enthusiasts will tell you that it’s okay to frequently replace a chain because they aren’t that expensive. A sign that you need cassette replacement is when your chain goes beyond 0.8 mm and has worn out. That’s because chains do get stretched as you use them.