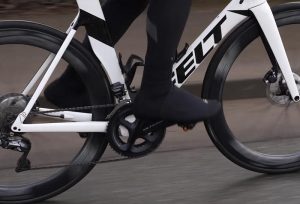
When you see that your brakes are keeping your bike tire from spinning properly the way it used to, there might be a problem with your disc brakes. Unlike traditional rim brakes, disc brakes are made of different mechanisms in which the braking pads might rub against the rotor.
You may also hear that the caliper brake could make some sort of annoying noise. This noise might have been caused by unwanted friction in between. This will eventually result in a waste of energy when you are riding your bicycle.
See also:
Sometimes, you might be tempted to replace the braking pads because you think that they’re at fault. However, you might eventually see and realize that the braking pads are simply misaligned and not necessarily broken or worn out at all!
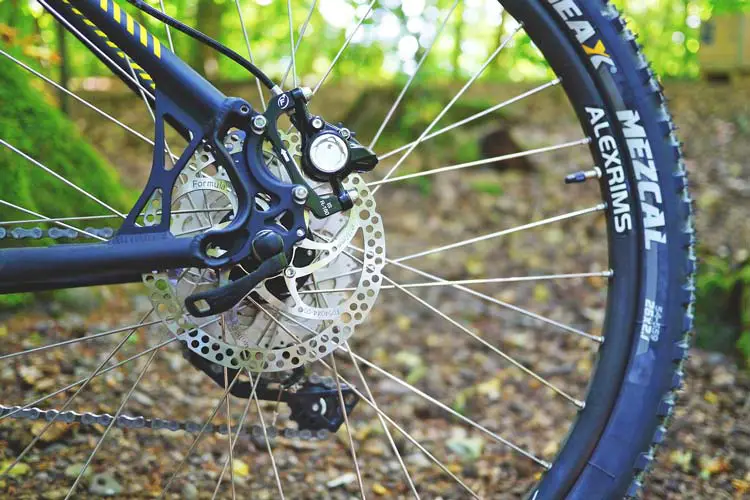
Having misaligned braking pads sometimes happens when you are disassembling your bike too often, which is unavoidable. Oftentimes, disc brakes can get misaligned if you take them with you inside a car for travel, and even especially when packing them up for air travel.
Generally, it’s hard to maintain the correct alignment of every bike part all the time, which is why checking properly and regularly is important.
So, how do you work on a solution when the disc rotor is oddly being rubbed on by the disc brake pads? Fortunately, we have a tutorial just for you.
Contents
How to Adjust Bike Disc Brakes Rubbing
Here are some quick and easy tips that you can do on how to adjust your disc brakes when they are rubbing against the rotor:
1. Centering the brakes
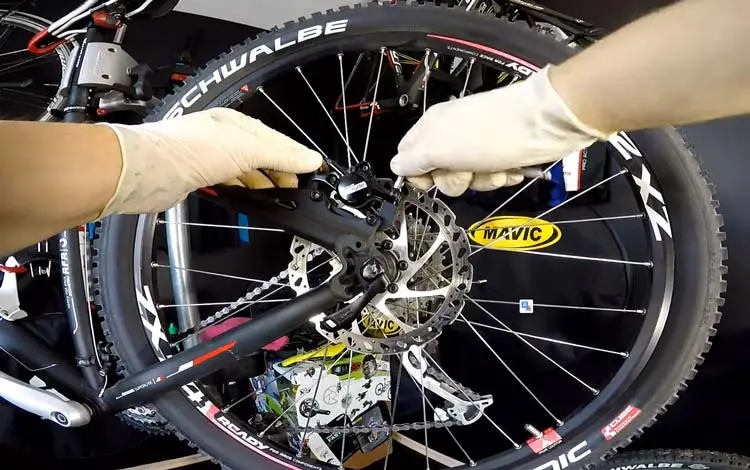
Start by loosening (not unscrewing) the mounting bolts from the disc brake mechanism. You’ll only want the caliper to move around just fine so don’t take out the bolts too much.
You’ll want the brake to be perfectly centered when compared with your disc rotor, similar to how you would align braking pads on a rim brake bike.
Next, apply the lever on one side of the handle to test out if your rotor isn’t smudged by the braking pads anymore. Hold onto your brake lever with one hand and then secure the bolts that we loosened earlier with a hex wrench on the other. What this action does is that the pads are being gripped better while you are applying the brake lever.
This will also make the caliper true when it comes to aligning it with the rotor. Keep in mind while this method works for a majority of bike brake brands and designs, there are still instances when it might not work properly.
Without applying the brake lever, give the bike brake a test by spinning the wheel. It should spin significantly freer than it would before, indicating that the braking pads are not rubbing anymore. However, if you are not satisfied with the way it spins, you can move onto the next step below.
2. Adjusting the caliper
You can do this step without a lot of extra tools. Adjusting the caliper will allow for a manual option with your hand, and then checking visually. Eventually, it will add extra smoothness to your wheel when you spin it.
First, go to your disc rotor and make a thorough inspection. When you compare the outer and inner sides that are separating the brake pads and the disc rotor, there should be somewhat a big distance between them.
With one hand, gently grab the bike brake caliper. Then, on the other hand, use your Allen key or hex wrench to loosen the bolts that we mentioned earlier. What we want is for the caliper to be moved further inside.
Keep your hand on the caliper for a holding position. You’ll want to move the caliper either left or right. Don’t use it with your fingers because there is a possibility that you might push it too far. Instead, use your hex wrench (that you used for bolt loosening) and then tap each side (left and right) of the caliper using the elbow corner of the tool mentioned. Remember to do it gently!
The idea is to get the disc rotor and the caliper properly aligned. Check the other side if the distance is okay or not yet. Keep adjusting and tapping until you get the desired correctness in terms of alignment.
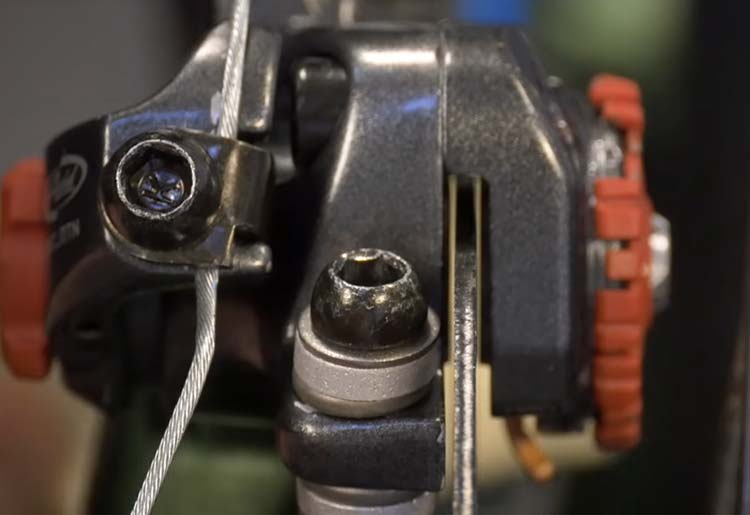
After everything is in place and you are satisfied simply tighten your bolts again with the hex wrench. Then, you can let your hand go of the caliper. Be careful when doing this so as not to accidentally move the parts or misalign them, thereby ruining your adjusting process.
Keep in mind that how often you need to adjust the caliper before you get a perfect wheel spin with your bike disc brakes depends on various factors, such as the model of your bike, the disc brake brand, and how old it is.
Disc brake rotors aren’t usually 100% true so it’s okay to leave a bit of room for error and don’t be too much of a perfectionist. Regardless of the millimeter of the distance of the left and right braking pad, it should be visually equal in distance to the rotor.
You can also check further after you make adjustments to the disc brakes by applying the brake lever. Who knows – you might spot other hindrances to your bike brake performance that you can fix right off the bat. You can do this step either on the back of the front wheel – whichever needs it.
How to Maintain Disc Brakes
Although the tolerance of disc brake pads and the rotors is already quite well, there could be still room for error when it comes to rubbing. Here are some tips to avoid this rubbing problem:
1. Pack the rotor properly
As mentioned above, the problem with disc brake bikes is transportation – you have to pack the rotor properly because it is prone to bending and going out of shape if you are not careful, causing your bike brakes to become ineffective later on.
Although this damage is reversible if you have the necessary tools, there are some instances where a simple bend won’t do the trick anymore and you’ll need to do something else.
The reason why rotor maintenance is important is that it will affect caliper alignment. The caliper going out of alignment also means more tendency of rubbing onto the rotor (and we’ve covered this above) but this only works on a rotor that is not thoroughly damaged or warped just yet.
2. Ensure proper bleeding
Compared to traditional cable bike brakes, such as rim brakes, you’ll need to bleed your disc brake bike instead, which is a bigger type of maintenance but is less often required. Bleeding will affect your disc brake performance and it will result in an annoying squishy sound.
When your braking performance isn’t working as intended anymore, it could be that some air got inside of the hydraulic system, causing a lack of efficiency for braking. This is when you’ll need to bleed your bike brake. Bleeding a hydraulic bike brake system is similar to that of change oil in a regular vehicle – you’re getting the dirty oil out and clean one in.
3. Keep your rotor and parts away from contamination
When you hear some sort of screech when you apply the brakes, it could be a sign that your rotor and pad need to be cleaned. Brake failure is also a big threat that could happen, which is life-risking when you’re on difficult terrain or bad weather.
Therefore, a well-maintained and properly-cleaned disc brake rotor and system will help your brakes to become efficient and save your life in the long run.
First, whenever you are spraying with anything in an aerosol can form, be sure to cover your rotor, calipers, and other bike brake parts properly as this will cause contamination in them.
Most bike enthusiasts prefer the spray-and-wipe method (using the aerosol onto a cloth and wiping it on bike parts) to avoid this problem. It also works more precisely when aiming at certain parts of your bike. Some items that you can use for this method are any old cloth, such as a shirt or towel. You can also use any plastic material.
You may also want to use a bike cleaning product that is safe to use on disc brakes (read the manufacturer’s specifications and formulations, just to be sure). Aside from that, having a disc brake cleaner is also effective – they are typically available in most bike shops.
If you do end up with a bike brake component that’s been withered away by corrosion, you need to take it out right away or else it will spread its contamination throughout the bike! Then, you can start cleaning it separately with various rust removers in the market, or you can use alcohol or some other method.
Make sure you always wear safety gloves because when you sweat, your bike parts might pick it up and cause contamination. Also, you don’t want your hands to get all greasy, right?
