Contents
What is a dropper post on a mountain bike?
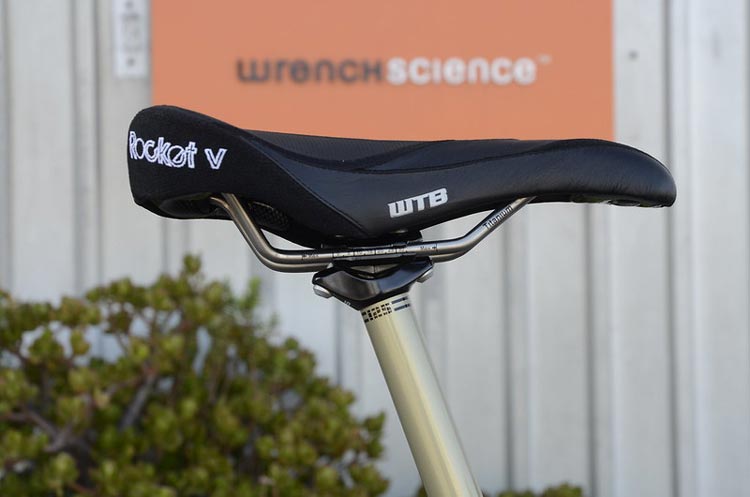
The dropper post is a mechanical setup that allows you to adjust the seat post height of your bike quickly and without having to get off the bike. Usually, dropper posts are controlled similar to a handbrake with a lever that’s installed on your handle.
Many mountain bikes nowadays are dropper post-compatible and many bike enthusiasts are slowly trying out a dropper post. However, not many are investing yet since it adds a little more expense to their bike.
Why use a dropper post?
Dropper posts have many uses, such as the following:
1. Technical sections
When it comes to mountain biking, the preference for seat height varies between the kinds of trails you want to ride on. For instance, high and steep sections require a high seat while tricky terrains require you to have a lower seat.
2. Pedaling efficiency
A lowered dropper post will give you pedaling efficiency. While you might not feel its effects at first when you get the post installed, it has a lot of usabilities as time goes on. For instance, you can just drop the saddle and jump around.
Technical riding with a dropper post is becoming a trend among riders as dropper posts give more bike control.
3. User convenience
A dropper seat post allows you to easily adjust the dropper. It’s just the simple matter of pushing the switch that’s attached to your handle. It allows you to conveniently move the seat up and down when you need it – releasing locks the seat into place.
The mechanism is similar to that of an office chair so it will lead to user comfort and convenience. With that said, some bikes have dropper-ready features, such as a port to run a release cable inside the frame. Moreover, they allow easy installation of an integrated dropper post.
However, for bikes that aren’t dropper-ready, you can just use a normal dropper post, in which you have to hook the cable up on the outside. This type of setup is inexpensive and easy to install.
4. Ideal for mountain biking
Dropper posts are significantly beneficial for mountain biking due to the varying terrain. Simply adjust it to your full ride height for technical sections. Although it does have a small weight trade-off, nowadays, more people are discovering the convenience of a dropper post.
With that said, here’s what you need to know about installation when it comes to dropper posts:
- The installation depending on the rider’s height. There are cable and hydraulic release types, in which case the cable type is usually easier to fix.
- As long as you keep it clean and provide plenty of air pressure, your dropper post should be fine.
- It’s good to have a dropper post that comes with a basic seat clamp with micro-adjustments to the angle of your saddle, as well as one that has a release on the bottom of the post to disconnecting easily for service.
- Some units also have an optional switch to integrate with the ODI switch.
How to Choose the Right Dropper Post for You
If you don’t know how to choose the right dropper post for your needs, here are a couple of considerations that you might want to look into first:
1. Make sure to get the correct diameter
A dropper post should be just the right size for your needs. Typically, a bike manufacturer will display a chart to let you know which diameter you need for your bike.
To know what diameter you need, you have to do some inspection of your bicycle. Removing your existing post will expose a manufacturer specification for its dropper seat post diameter. Typical modern dropper posts have about 30.9 to 31.6 mm, so that’s already a guide for you. However, not all bicycles have the same diameter, so it depends.
2. Know the type of cable routing.
A dropper post may have either a hydraulic or cable pull actuation type of setup. You can choose from either internal (stealth) routing or external (non-stealth) routing as well. Both of them have their pros and cons.
With that said, most modern bikes have internal routing simply because many bikers simply prefer a setup without eyesore cable on the bike. To achieve this type of setup, there is a hole inside the dropper post for the cable to go through.
3. Check the dropper travel of your intended post
This refers to the amount of the drop on the post and can come in various measurements, such as 100 mm, 125 mm, 160 mm, and so on. If you ask most experienced riders and bike builders, they’d say that a bigger dropper travel measurement is preferred for the best results.
With that said, some XC (cross-country) riders might prefer a 100-mm dropper travel to avoid the feeling of the seat disappear. Most of them claim that a lower drop travel value can lead to a good pedaling position and that it is also slightly lighter in weight. However, this is all depending on user preference.
4. Observe the stack height of the post
Take measurements on the length of the seat post and the stack height. Keep in mind that a stack height that’s too high will result in your legs locking out and your hips rocking on the saddle, causing discomfort.
Usually, the measurement is from the seat post collar to the saddle rail. One tip is to use your original post, set max height for pedaling, and measure it. The common value is 235 mm depending on the bike. Supposed you have this value: subtract 50 mm for seat post collar and bottom of the clamp, resulting in 188 mm.
Now that we have this information, when you run a dropper post, this means 160 mm will fit into your bike just fine.
5. The insertion length should be just right
The bicycle’s insertion length is how far the seat post will slam into the frame before it hits an obstruction. Many bike seat tubes with kinks may not work with certain dropper post types. To measure your insertion length, remove your seat post, measure with your tape until you hit an obstruction.
One important tip for this parameter: don’t go beyond the minimum insertion length marked on the seat post to avoid damaging your post and frame. Additionally, you should also measure your saddle height, which is from the middle of BB (bottom bracket) to the top of the saddle.
6. Find a comfortable remote lever to use and place
After all, a properly positioned and working remote lever is important as this will run your drop post. Having a front derailleur means running it on the top of the bar on the left-hand side. A dropper post lever should be very useful so before using your system, you should think about where to put the lever on the bike for the best comfort.
Product Reviews
If you’re looking for a budget-friendly dropper post to add to your mountain bike for convenience, here are our recommendations:
1. Tranz-X Kitsuma Dropper Post
With an external cable routing, setting up this dropper post wasn’t a hassle since its connection point is near your seat tube. You won’t experience any tangles with this dropper post unlike others in the market, which has an under-seat connection point.
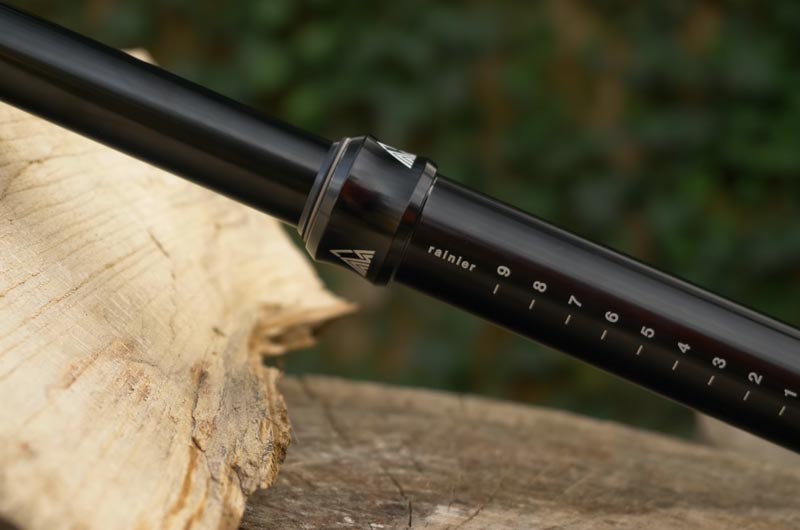
In terms of construction, it has a solid feel while also having a smooth finish. It’s easy to see the markings on the post so you won’t make mistakes when setting it up on your bike. There’s an external cable that protects the mechanism from dirt, which will help a lot with maintenance. It also has a smooth movement either way.
What we don’t like is that it does have a slight audible at the stroke top, which could be an annoyance to some. It also doesn’t come with a dust cover.
2. KS ETEN Dropper Seatpost
The KS ETEN Dropper Seatpost might have some added weight as it is at 700 grams. As for the cable routing, it goes to the bottom of the post and is piped all through your post, routed externally.
Therefore, when it comes to set up, it goes to the top of the head, leaving you a big loop of cable so you might need to zip-tie your cable. This means that it can catch on things and rub on your legs. It only has 100 mm travel but it’s good for an entry-level dropper post.
A couple of challenges would be how to make the saddle fully out of the way while not making it too low for paddling properly and also not quite out of the way when descending. Although you might notice a sluggish speed on the return, it still works just fine with the lever.
3. Venzo Mountain Bike Dropper Post Seatpost Remote
With a clean internal routing and a simple installation, this dropper post might not be the lightest in the market but we like that it has a lever that’s changeable to horizontal mode, giving you comfort.
It is easily lockable and convenient to set at the preferred height. However, we think that an added spring mechanism would improve its return strength and speed. When installing a cable to this seat post, you have to be careful about the splinters. It also has instructions that are a little vague to follow for beginners.
4. PNW Components Cascade Dropper Post
This external-routed post is ideal for those without fancy bikes. It is cable-actuated with less maintenance and is connected at the collar instead of the saddle seat so the cable doesn’t move, so you’ll ride the bicycle without a cable rubbing.
Another advantage of this dropper post is that the cable is stretched less and not bent outwards. With this, you don’t have to adjust the cable. Furthermore, the company is a family-owned business with reliable customer service.
The design allows the dropper post to sit deeper in the frame. This feature helps with going through mud. What’s more, it comes with a lever, compared to other brands that you have to buy separately.
5. OneUp V2
This dropper post has a low stack height to insert the post further into the frame. Unlike other dropper posts that seem to have an excessive protrusion, the OneUp V2 sits comfortably low.
With a short insertion length, it allows you to insert it further into the frame compared to most posts in the market. Another feature that we like is that it allows you to shorten the drop in 10 mm increments up to 20 mm per size for a customized riding preference.
However, a minor con is that the lever sits higher so it takes a bit of getting used to with the adjustment/placement.
6. BikeYoke Revive Dropper Post
This unit is easily serviceable without the need for specialty tools (a DIY-friendly dropper post), especially when you need to reset it. You don’t have to send it to the manufacturer, which might significantly take a huge chunk out of your biking schedule.
What’s unique about this dropper post is that bleeding is not a hassle and can be done trail-side so it’s not inconvenient. Perhaps the only slight con is that it is hydraulic so it’s not for people who prefer cable-type.
7. Crankbrothers Highline 30.9 Dropper Seatpost
This convenient seat post has a unique lever design that allows you to keep it twisted right or left, which means you can use it to fit whatever riding style you’re comfortable with. It also has a clean look due to the internal routing setup, which won’t get in the way of your legs.
The dropper post already comes with lubrication so it’s ready for maintenance needs. The construction feels durable and will hold up to most crashes. However, a slight issue is that in the winter, the post isn’t that stable with locking, so it’s best to use it for the summer instead.
8. Fox Racing Shox Transfer Factory Dropper Seatpost
We like the lever design of this seat post, which has a textured surface so you might not need grip tape.
It has Kashima-coated aluminum so it looks quite classy. With an easy installation compared to other dropper posts, you can use Wolf’s tooth lever to make it smoother in terms of operation.
As for durability and design, it doesn’t need service too often even as far as 6 months (YMMV, though). Overall, this dropper seat post is a great budget-friendly alternative to its more expensive counterpart.
How to Install a Dropper Seatpost
Now that you have your dropper seat post, how do you install it? Here are the basics:
1. Remove the old seat post on your bike.
2. Put a little bit of grease onto the new seat post. Use a thin coating and run it around the new seat post to prevent galvanic corrosion.
3. Inspect the new seat post’s insertion line. Check the minimum insertion line and make sure you insert it as far as that.
4. Line up the new seat post and slide it in. Clamp it down onto your bicycle.
5. Transfer your saddle from the old to the new seat post.
6. Adjust the saddle height with the seat post fully extended. Make sure that the saddle is straight before clamping it down.
7. Install the trigger lever/remote for the seat post. Most units will have a seat clamp without having to remove anything from the handlebar. It all comes down to preference when it comes to the direction and position. Make sure that it is comfortable to access and to trigger.
Most screws take a 3 mm hex tool but it depends on the dropper post. Make sure that it is positioned where using a tool won’t be awkward when you want to move it.
8. Install the cable. To do this, remove a plastic cover on the mechanism, and carefully pry it off and it snaps away. The cable will connect inside – a cable may look like a shifter-type cable, in which the head will go into the top part and pulls down. It releases the seat post to move
A little slot in the plastic cover and put it into the slot and it will cover it and snap it into place. The cable can be pulled from the bottom. If it comes with cable housing and if it’s too long, you should trim it down. The cable housing goes from the mechanism.
For a smooth transition, add guides to mount at the bottom and run it up to the trigger. On the rotating ferrule part, the cable goes there. Add more cable housing so that the handlebars can turn comfortably without lacking housing without binding a lot.
Use a cutter to trim the cable housing appropriately. Then, use an awl to open up the lining, take the ferrule off the other end of the cable and insert it.
9. Run the cable into the housing. The end of the cable housing sits into the mechanism. Simply route the housing up and let it rest over the handles. The rotary ferrule will slide into the trigger remote and it can pivot around. Feed the cable into it and it comes out from the other side. Seat the end of the cable housing from the top.
10. Get the cable mounted to the remote trigger. The cable will slide from the bottom of the trigger – use the hole in the barrel nut and it will clamp onto the cable. The floating and moving back and forth metal item should be in the position. Make sure it is aligned so that the barrel nut can fit in there.
Push it forward with a wrench and slide the little barrel nut inside correctly, as this allows you to close the lever all the way. If it stops then it doesn’t fit well. On installation, use a 3 mm Allen wrench and put it into the fitting and barrel nut and rotate it, and then align the hole with the cable.
Add some light for some visibility since it is a small item. The cable should come from the bottom of the trigger. Afterward, close the trigger and then pull the cable taut. Use a 2 mm wrench on the other side and screw the clamp closed on the cable.
11. Check if it works. Test the remote if it works by pushing the seat down and push it, and it should go back up. There is a guide under the lever – make sure the cable is aligned with it.
12. Perform the finishing touches. Then, trim but leave enough cable and then add the crimp end then crimp it with some pliers. For security and a clean finish, add zip ties to make your cables cleaner.
How to Ride With a Dropper Seatpost
So, how do you use a dropper seat post? Here are the basics:
1. Setup
First, think about the pedaling saddle height. It should be comfortable – 125 mm is typical so it won’t be too high or too low. It also matters where you place the remote lever and it should be comfortable to reach by your thumb. A good setup order would be brakes, dropper post, and then shifter.
2. Push the remote
Use your weight to drop the saddle, let go of the remote, and it stays down. Then, pop it back, keep your weight off the saddle, press the remote, and it goes up. Using a dropper post takes some practice.
3. Descending
Dropper post usage will be comfortable downhill. First, drop it early, then drop your heels, then get your hips right to the back of the bike.
4. On the flats and climbs
Dropper posts are also usable for flat sections and climbing, depending on your comfort or preference. They’re not always for downhill and obstacles.
5. Cornering
With corner turns, get your hips lower for a lower center of gravity. It lets you start to move your hips and get more of your weight over the tires. It also allows more dipping, resulting in a tighter bike turning.
5. Technical sections and obstacles
You can use it to keep your saddle low if you see a rough section or if you want to prepare for a hop or jump.